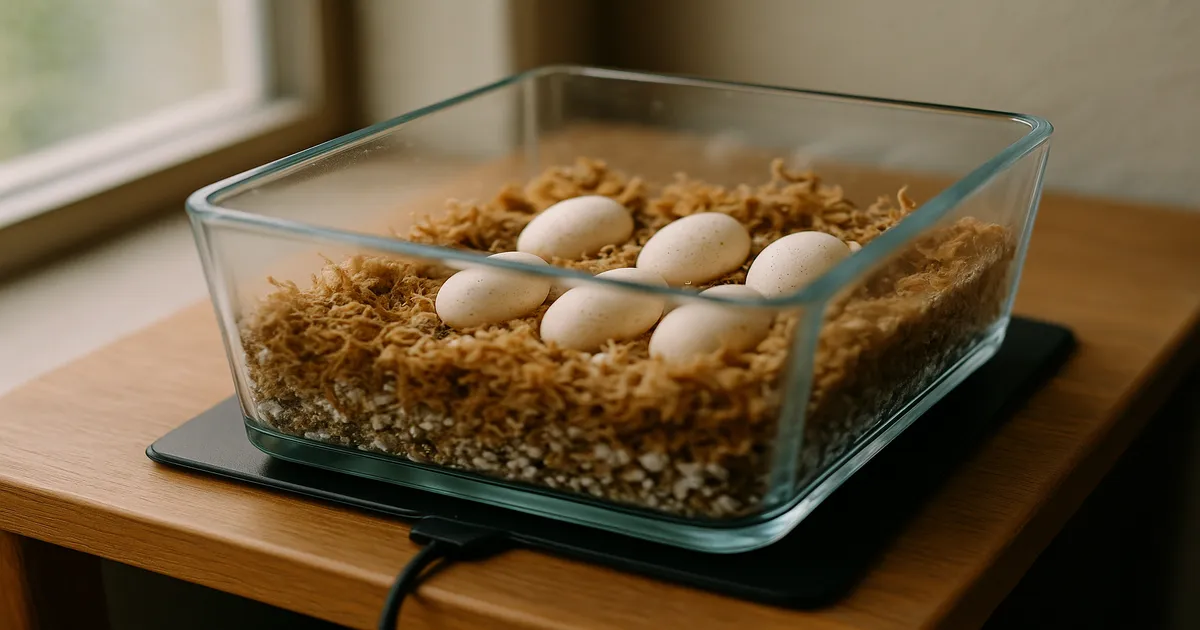
Quick Answer: Collect crested gecko eggs without rotating them, mark the top of each egg immediately with a soft pencil, and incubate them in a sealed container with moist substrate at 68–78°F (20–26°C). Humidity should sit at 80–90% inside the container. Expect hatching anywhere from 60 to 120+ days depending on temperature — cooler is generally better. These eggs are more forgiving than most reptile species, and if your home stays in that temperature range naturally, you don’t need a dedicated incubator at all.
Knowing how to care for crested gecko eggs properly is the difference between a good hatch rate and a frustrating season of losses. The good news: crested geckos are genuinely one of the easier species to breed. Their eggs tolerate a reasonable margin of error, and you don’t need a lot of expensive equipment to get started. That said, there are a few mistakes that will tank your hatch rate fast — and this guide covers all of them.
Understanding Crested Gecko Eggs: What to Expect
Clutch Size, Frequency, and Breeding Season
Every clutch is exactly two eggs — no exceptions. That consistency makes record-keeping straightforward, which matters when you’re managing multiple females. A healthy, well-fed female can produce 6–10 clutches per season, typically running from around February through September in captivity.
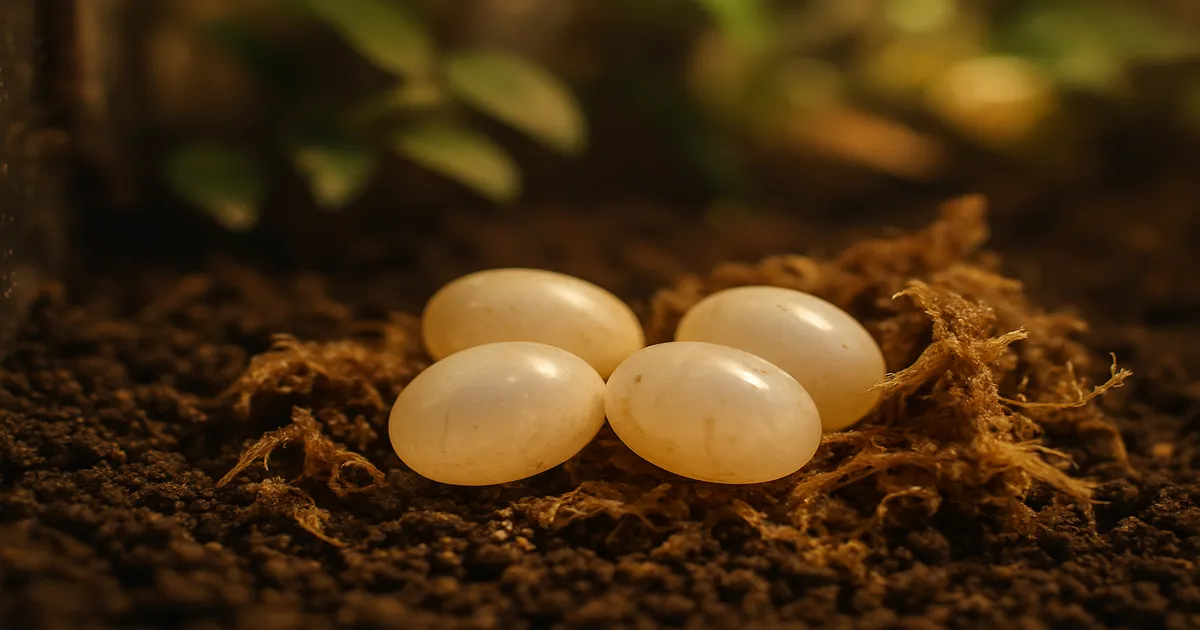
What Fertile Eggs Look Like
Fresh crested gecko eggs are white, oval, and leathery — not hard like a bird egg. They’re roughly 1–1.5 cm long when first laid and slightly pliable to the touch. With correct humidity, they’ll plump up noticeably within 24–48 hours. Slight dimpling right after laying is normal and not a cause for panic.
Temperature Affects Development — But Not Sex
This trips up a lot of keepers coming from bearded dragons or leopard geckos: crested gecko sex is genetically determined, not temperature-dependent. Warmer incubation speeds up development — roughly 60–75 days at 78°F (26°C) versus 90–120 days at 72°F (22°C) — but it won’t change the sex of your hatchlings. The species evolved in New Caledonia’s mild, stable climate, which is exactly why room-temperature incubation works so well.
Setting Up a Lay Box
Container and Substrate
A dedicated lay box is one of those things that seems optional until you’ve spent 45 minutes digging through enclosure substrate looking for eggs. Use a plastic deli cup or small Tupperware container with a hole cut in the lid — just large enough for the female to squeeze through. Fill it 3–4 inches (7.5–10 cm) deep with moist coconut fiber, sphagnum moss, or plain topsoil. That depth gives her room to dig and deposit properly.
Placement and Maintenance
Put the lay box in a lower, shaded corner of the enclosure where it’s slightly cooler. Check the substrate weekly to make sure it stays consistently damp — not wet. During breeding season, I check my lay boxes every two to three weeks for eggs. Waiting much longer risks missing a clutch or finding eggs that have already started to desiccate.
How to Collect Eggs Safely
Crested gecko eggs aren’t adhesive, so retrieval is straightforward — gently brush away the substrate. The single most important thing you can do at this stage is mark the top of each egg immediately with a soft pencil before you move it. Rotating a developing egg after the first week or two can kill the embryo by displacing the air cell. Mark it, then transfer it in the same orientation it was found. Every time. No exceptions.
How to Care for Crested Gecko Eggs During Incubation
Temperature: The Most Important Variable
The ideal range is 68–78°F (20–26°C), with 72–75°F (22–24°C) being the sweet spot most experienced breeders aim for. Don’t let temperatures exceed 80°F (27°C) — even brief, repeated spikes can cause developmental deformities or outright embryo death. Cooler incubation tends to produce larger, more robust hatchlings, so sitting at 70–74°F (21–23°C) is genuinely fine.
Stability matters more than precision. Temperature swings greater than 3–4°F (1.5–2°C) within a 24-hour period are more damaging than sitting at 73°F instead of 72°F. A cool, dark room with naturally stable temps will often outperform a cheap incubator with inconsistent heating elements.
One thing people don’t think about until it’s too late: a room that sits at 72°F (22°C) in January can hit 85°F (29°C) in July. Plan ahead for summer, or you’ll lose an entire season’s clutches.
Humidity: 80–90% Inside the Container
The easiest way to check substrate moisture is the squeeze test — grab a handful and squeeze firmly. No water should drip out, but the substrate should feel clearly damp. Use distilled or reverse-osmosis water for any top-ups. Check moisture every 2–3 weeks and add a small amount if needed. Don’t mist directly onto the eggs; mist the substrate around them.
If you’re seeing condensation pooling on the inside of the lid or on the eggs themselves, your substrate is too wet. Open the lid briefly to let some moisture escape and dial back the water next time you set up a container.
Equipment You Actually Need
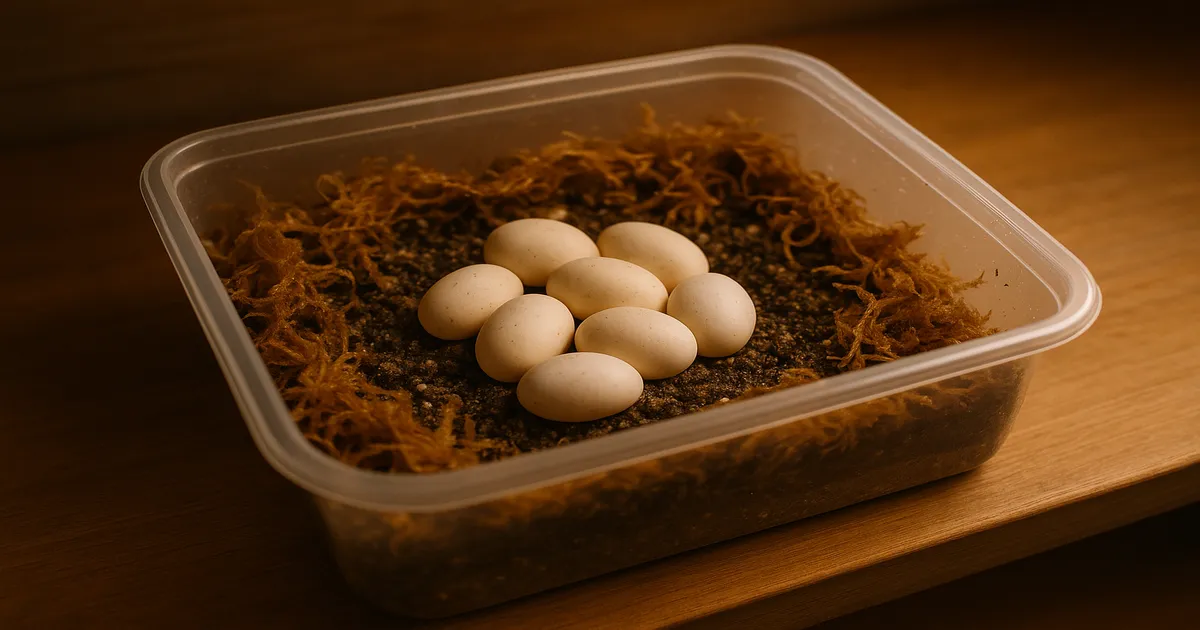
Incubation Containers
32 oz (roughly 1 liter) deli cups are the hobbyist standard for good reason — cheap, widely available, and the lid seals tightly enough to maintain humidity without modification. Gladware containers work too and give you a bit more substrate depth. Specialty reptile incubation kits exist but are genuinely unnecessary for crested geckos.
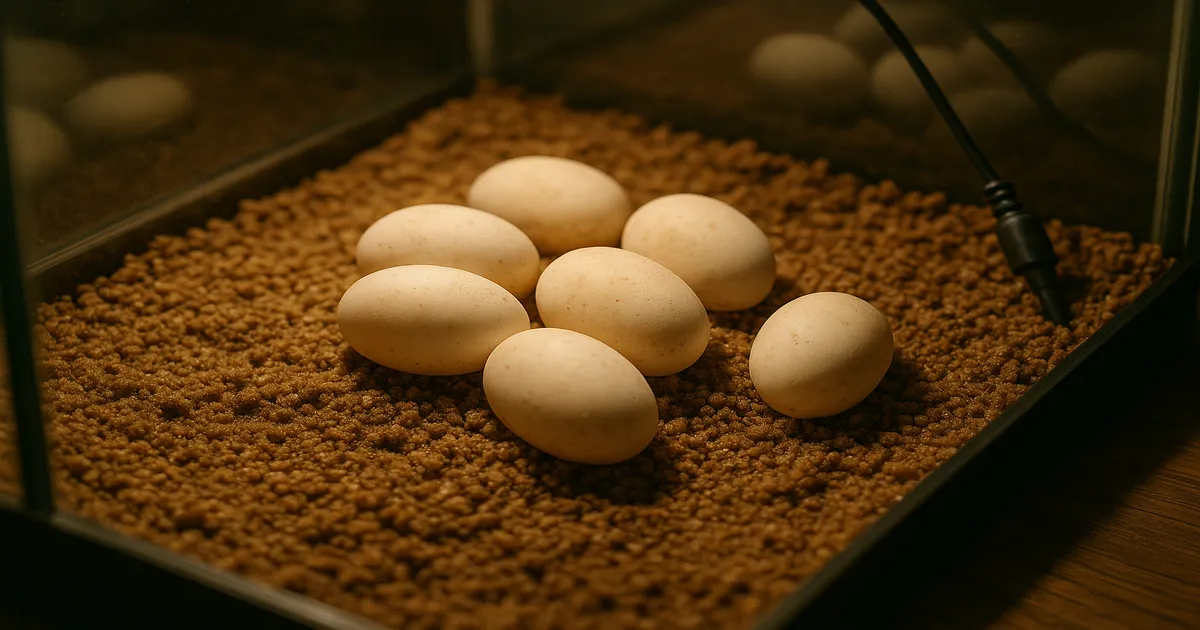
Best Substrates for Incubation
| Substrate | Mix Ratio | Best For |
|---|---|---|
| Hatchrite (pre-mixed) | Ready to use | Beginners — no guesswork |
| Vermiculite | 1:1 by weight with water | Intermediate; inexpensive and reliable |
| Perlite | 1:1 by weight with water | Lower mold risk; slightly faster draining |
| Long-fiber sphagnum moss | Moisten and wring out | Naturally antimicrobial; great for mold-prone setups |
Do You Need a Dedicated Incubator?
For most keepers in temperate climates, no. If your home stays in the 68–78°F range year-round, a cool room or basement shelf works beautifully. You’ll need an incubator if your ambient temps regularly climb above 80°F (27°C) in summer or drop below 65°F (18°C) in winter. If you go that route, pair it with a quality PID thermostat rather than relying on the built-in controls on budget units, which are notoriously inaccurate.
Monitoring Tools
- Digital thermometer/hygrometer combo — non-negotiable; you need to know what’s actually happening in your incubation space
- Soft pencil — for marking egg orientation; don’t use a Sharpie, the fumes can be harmful to developing embryos
- Small LED flashlight or egg candler — for checking fertility at 2–3 weeks
- Gram scale (optional) — useful for tracking egg weight; consistent loss of more than 10–15% of starting weight signals a humidity problem
Step-by-Step Incubation Setup
- Prepare your substrate. Mix to the correct moisture level (squeeze test: damp but no dripping). Fill your deli cup to about 1–2 inches (2.5–5 cm) depth.
- Press small depressions into the substrate for each egg — just enough to cradle them and prevent rolling.
- Collect eggs from the lay box, marking the top of each one immediately with a soft pencil before lifting.
- Transfer eggs without rotating them. Nestle each one into a depression, marked side up.
- Seal the container with a tight-fitting lid. Label it with the date laid, the pairing (sire × dam), and the clutch number.
- Place in a stable, cool, dark location — or in your incubator if ambient temps aren’t suitable.
Ongoing maintenance:
- Check substrate moisture every 2–3 weeks; add distilled water in small amounts if it’s drying out
- Candle at 2–3 weeks to confirm fertility
- Avoid opening the container unnecessarily — every time you pop the lid, you’re disrupting the microclimate
- If using a gram scale, weigh eggs every 2–3 weeks and note any trends
Candling: How to Tell If Crested Gecko Eggs Are Fertile
Hold a bright LED flashlight or egg candler firmly against the egg in a darkened room. Do this at 2–3 weeks after collection — early enough to identify slugs before they mold, late enough that development is clearly visible.
A fertile egg at 2–3 weeks will show a pink or red network of blood vessels radiating from a small embryo. An infertile egg (a “slug”) looks uniformly yellow or orange with no visible structure — just a blank, glowing interior. Fertile eggs also tend to stay white and plump, while slugs often remain small and start to wrinkle.
Don’t pull an egg just because it looks slightly off-color or yellowish. Wait at least 30–45 days and confirm with candling before discarding anything. Once you’ve confirmed an egg is infertile, remove it promptly — slugs mold fast, and that mold will spread to your viable eggs.
Troubleshooting: Mold, Problem Eggs, and Female Health
Mold on Substrate vs. Mold on Eggs
A little surface mold on the substrate is common and not immediately catastrophic. Wipe it away with a paper towel and reduce substrate moisture slightly going forward. Mold directly on an egg is more serious — treat it gently with a cotton swab very lightly dampened with dilute betadine solution (roughly 1 part betadine to 10 parts water), let it air dry for a minute, then return the egg to the container. A small amount of activated charcoal mixed into your substrate layer can help suppress mold without harming the eggs.
Dimpling, Discolouration, and Weight Loss
Slight dimpling in the first 24–48 hours after laying is normal. Severe or persistent dimpling after that points to a humidity problem — check your substrate moisture and the seal on your lid. If you’re weighing eggs and seeing consistent loss of more than 10–15% of starting weight, address it before the egg desiccates beyond recovery.
Female Health During Breeding Season
This part gets overlooked, but it matters a lot. Females laying 6–10 clutches per season are under enormous calcium demand. Calcium + D3 supplementation at every feeding is non-negotiable, and I keep a small dish of plain calcium powder in the enclosure year-round so females can self-supplement as needed. Weigh your females regularly throughout the season — a female dropping below her pre-breeding weight should be pulled from breeding immediately and given time to recover. Give all females a 2–3 month winter rest by separating them from males and letting temperatures drop slightly. It makes a real difference in long-term health and egg quality.
What to Do When Eggs Hatch
Leave the hatchling alone. Once an egg has pipped, don’t assist unless the animal has been visibly stuck for more than 24 hours — premature help tears blood vessels. The hatchling may take another 12–24 hours to fully emerge. Once it’s out, don’t offer food until after the first shed, which usually happens within the first 5–7 days post-hatch. Separate hatchlings immediately; even tiny crested geckos will bite each other’s toes and tails.
Frequently Asked Questions
How long does it take for crested gecko eggs to hatch?
Anywhere from 60 to 120+ days, depending primarily on incubation temperature. At 78°F (26°C), expect hatching in roughly 60–75 days; at 72°F (22°C), it’s closer to 90–120 days. Cooler incubation takes longer but often produces larger, healthier hatchlings.
What temperature should I incubate crested gecko eggs at?
The ideal range is 68–78°F (20–26°C), with 72–75°F (22–24°C) being the target most experienced breeders aim for. Don’t exceed 80°F (27°C) — even brief spikes above that can cause developmental problems or kill the embryo outright.
Do I need an incubator to care for crested gecko eggs?
Not necessarily. If your home naturally stays within the 68–78°F range, a cool, dark room works just as well as a dedicated incubator. You’ll only really need one if your ambient temperatures regularly climb above 80°F (27°C) in summer or drop below 65°F (18°C) in winter.
How can I tell if a crested gecko egg is fertile?
Candle it at 2–3 weeks by holding a bright LED light against the egg in a darkened room. A fertile egg will show a visible pink or red network of blood vessels and a small embryo. An infertile egg will appear uniformly yellow or orange with no visible structure. Don’t discard any egg before 30–45 days without confirming with candling first.
Why do crested gecko eggs dimple?
Some dimpling in the first 24–48 hours after laying is completely normal as the egg settles. Persistent or severe dimpling after that is almost always a humidity issue — your substrate is too dry or your container isn’t sealing properly. Check both before assuming the egg is failing.